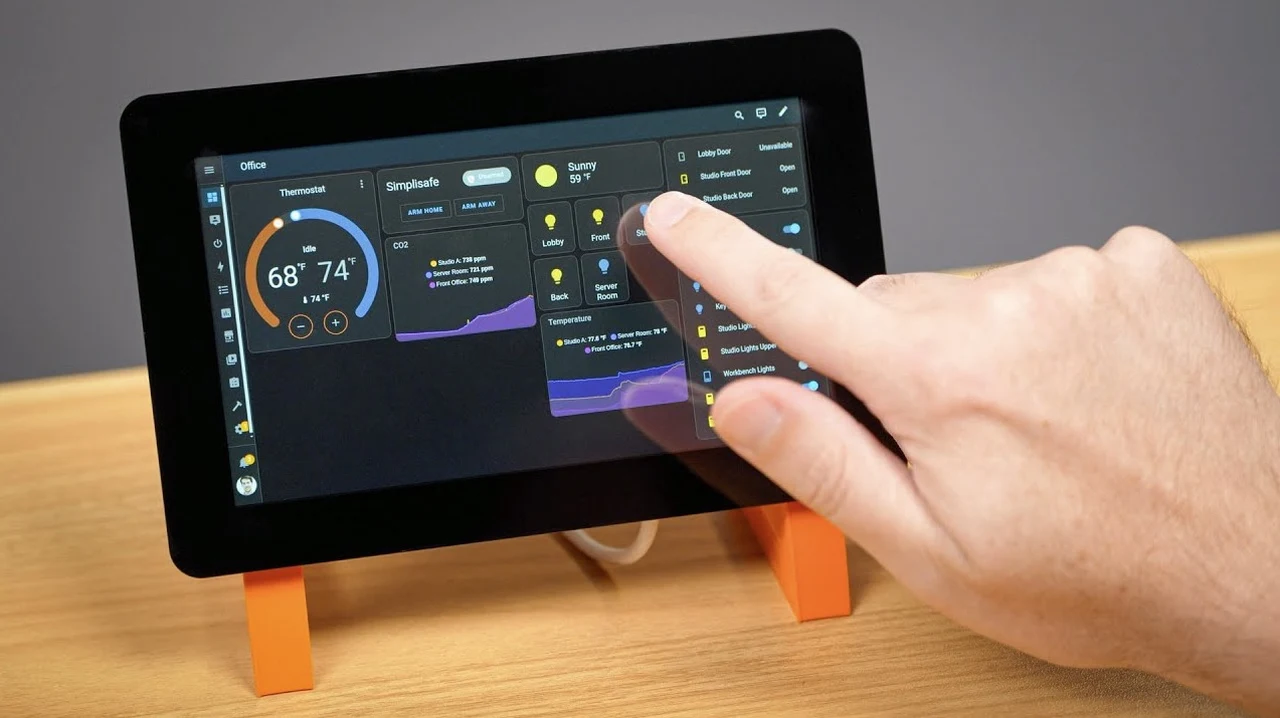
The official development team at Raspberry Pi have recently launched their second generation touchscreen in the form of the app named Raspberry Pi 2 Touchscreen. Providing an affordable and versatile platform for creating custom control panels that can be used to control your home or even your in-car entertainment system.
But why choose the Raspberry Pi Touch Display 2 over other options? Well, aside from its impressive 720p resolution and user-friendly setup, it offers a unique balance of cost-effectiveness and functionality that appeals to both hobbyists and professionals alike. Plus, with a vibrant community of makers and tinkerers constantly pushing the boundaries of what’s possible, you’ll never be short of inspiration or support. So, if you’re ready to embark on a journey of innovation and creativity, check out this interesting guide created by Jeff Geerling who explores its setup, applications, and potential, with a focus on home automation and automotive systems integration.
Pi Touch Display 2
TL;DR Key Takeaways :
- The Raspberry Pi Touch Display 2 is an economical option for creating control panels, priced at $60 with a 720p resolution and 5-point multi-touch capability.
- Installation requires a new mounting bracket and uses FFC cables and GPIO for power, with customizable display settings via command line.
- It integrates well with home automation systems using Home Assistant, though Linux touchscreen support and on-screen keyboard functionality may need troubleshooting.
- Compared to other touchscreen alternatives, it is noted for its affordability and ease of use, despite lacking some advanced features.
- Potential for car system integration exists, but challenges such as power supply, mounting, and temperature constraints need to be addressed.
Key Features and Specifications
The New Pi Touch Display 2 features several notable improvements and features:
- Upgraded resolution to 720p for sharper visuals
- Maintained affordable price point of $60 in the US
- 5-point multi-touch capability (reduced from previous 10-point)
- Compatibility with Raspberry Pi 5 and most other models (excluding Pi Zero)
- 7-inch display size, suitable for various applications
These features make the touchscreen an attractive option for hobbyists and professionals alike, balancing functionality with cost-effectiveness.
Installation and Setup Process
Setting up the Pi Touch Display 2 involves several steps:
1. Acquire a new mounting bracket design, as the touchscreen requires a custom stand for secure placement.
2. Connect the display using FFC (Flexible Flat Cable) cables and use GPIO pins for power supply, making sure a stable connection.
3. Customize display settings through command line interface:
– Adjust screen rotation to suit your mounting orientation
– Fine-tune brightness levels for optimal visibility
Tip: Familiarize yourself with basic Linux commands to streamline the setup process.
Pi Touchscreen Home Control Panel and More
Here are additional guides from our expansive article library that you may find useful on Raspberry Pi.
Integrating with Home Automation Systems
The Raspberry Pi 2 Touchscreen integrates seamlessly with home automation platforms, particularly Home Assistant. Here’s how to maximize its potential:
1. Install Home Assistant on your Raspberry Pi.
2. Configure your desired smart home devices and sensors.
3. Enable kiosk mode to automatically launch the Home Assistant dashboard on startup, creating an efficient control panel.
4. Design a user-friendly interface tailored to your specific needs.
Note: Be prepared to troubleshoot Linux touchscreen support and on-screen keyboard functionality, as these areas may require additional configuration.
Comparative Analysis: Touchscreen Alternatives
While alternatives like Seeed Studios’ HMI devices and Chipsy’s industrial panel PCs offer advanced features, the Raspberry Pi 2 Touchscreen stands out for its:
- User-friendly setup process
- Cost-effectiveness
- Extensive community support
- Flexibility in application
These factors make it an ideal choice for both beginners and experienced makers looking to create custom control panels.
Exploring Automotive System Integration
The Raspberry Pi Touch Display 2 holds promise for car system integration, potentially supporting interfaces like CarPlay or Android Auto. However, several challenges must be addressed:
1. Power management: Ensure stable power supply in varying automotive conditions.
2. Mounting solutions: Develop secure and aesthetically pleasing mounting options.
3. Temperature regulation: Address heat dissipation to maintain performance in extreme temperatures.
4. Software compatibility: Develop or adapt software to interface with existing car systems.
Overcoming these hurdles could open up exciting possibilities for custom in-car entertainment and information systems.
Future Prospects and Community Engagement
The Raspberry Pi community continues to drive innovation, with growing interest in larger display options. To stay at the forefront of developments:
1. Engage with online Raspberry Pi forums and communities.
2. Participate in maker faires and tech meetups to share ideas and gather feedback.
3. Experiment with emerging software and hardware combinations to push the boundaries of what’s possible.
As the ecosystem evolves, the Raspberry Pi 2 Touchscreen remains a powerful tool for developing sophisticated control panels across various domains.
The Raspberry Pi 2 Touchscreen offers a compelling blend of affordability, functionality, and versatility for creating custom control panels. Whether you’re automating your home, enhancing your vehicle, or embarking on a unique project, this device provides a solid foundation for bringing your ideas to life. By understanding its capabilities and limitations, you can use the Raspberry Pi Touch Display 2 to its full potential, opening up a world of creative possibilities in interface design and control systems. Part four full specifications on the Touch Display 2 jump over to the official Raspberry Pi website.
Media Credit: Jeff Geerling
Filed Under: DIY Projects, Hardware, Top News
Latest TechMehow Deals
Disclosure: Some of our articles include affiliate links. If you buy something through one of these links, TechMehow may earn an affiliate commission. Learn about our Disclosure Policy.
