Windows 11 24H2 is rolling out gradually. Microsoft is limiting the rollout due to multiple bugs and waiting for the OEMs updates before offering the update. But if you are tired of waiting, there’s a workaround to get Windows 11 2024 Update on your Windows 11 23H2 PC forcefully.
Windows Latest spotted and tried the ‘hack’, which helped many Windows 11 23H2 users get the new update. All you need to do is change a system policy using the Group Policy editor. Windows Latest tried this workaround on a Windows 11 23H2 machine and the trick worked fine.
The idea here is that you’re modifying Group Policy/Registry to look for “24H2” when checking for updates. You’re explicitly asking for Windows 11 24H2 here, instead of waiting for Windows Update to figure out on its own. Sounds interesting, right? Here’s how to do it using Group Policy:
- Open Group Policy Editor using Windows Search.
- In Group Policy Editor, go to to Computer Configuration > Administrative Templates > Windows Components > Windows Update > Manage updates offered from Windows Update section.
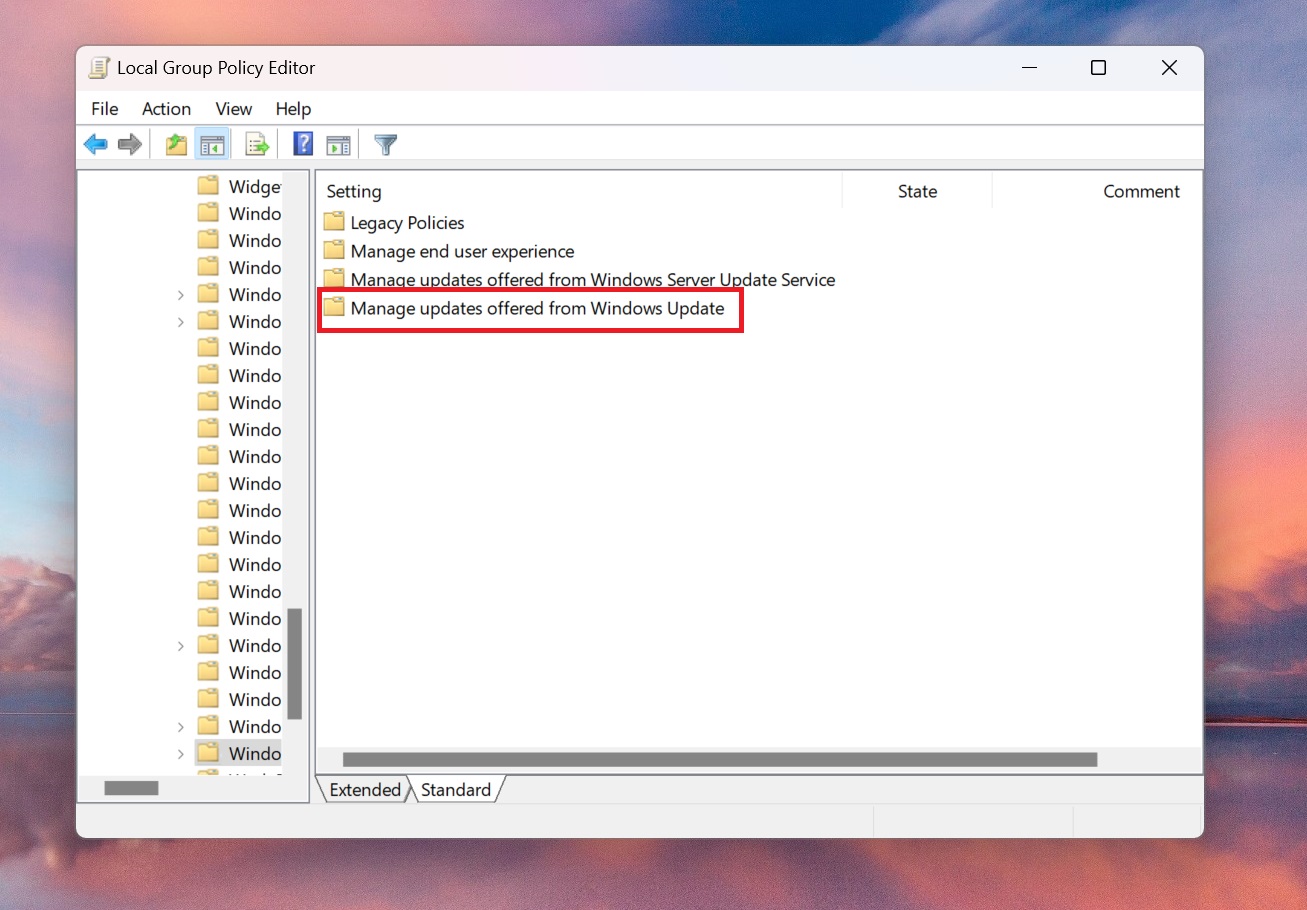
- As shown in the below screenshot, select Select the Target feature update version policy.
- You’ll need to select Enable option and type Windows 11 and 24H2 in the text boxes shown in the screenshot.
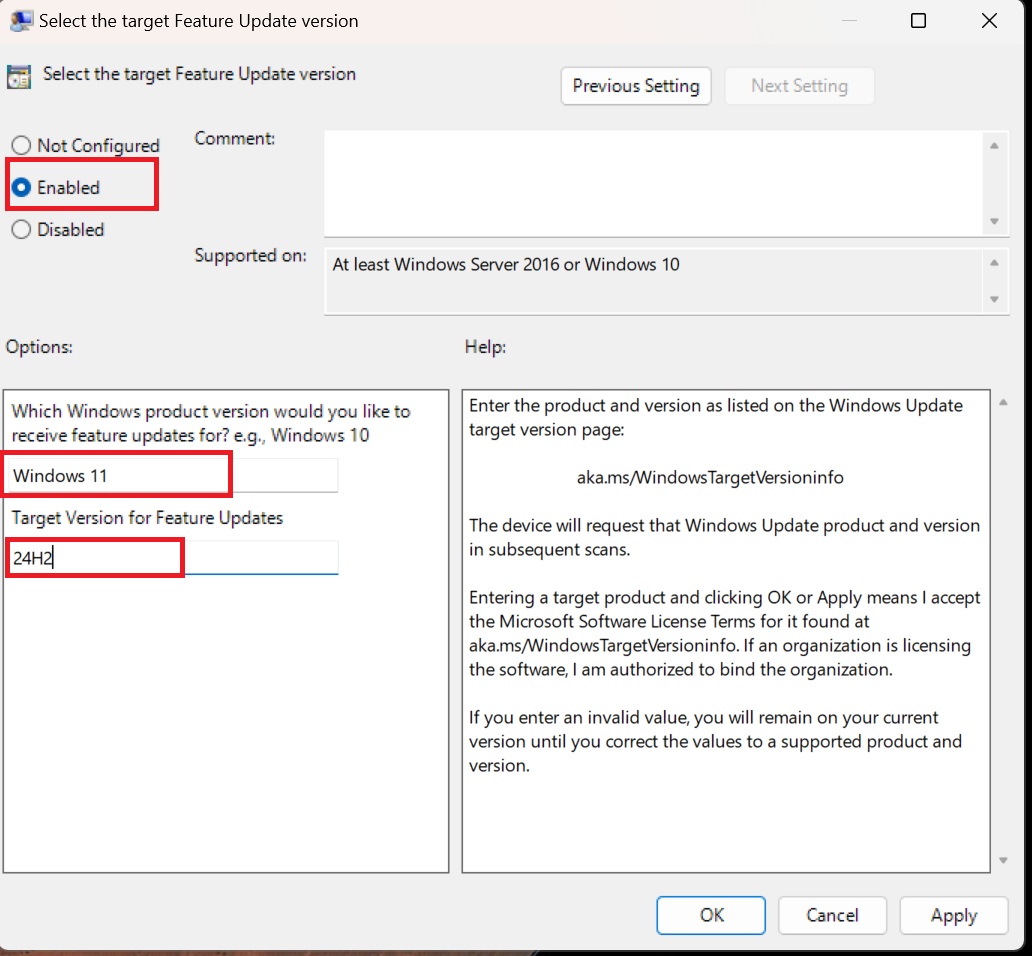

- Click on Apply and then click on OK.
- Restart your PC and check for updates in the Settings app.
- You’ll see the 24H2 download prompt.
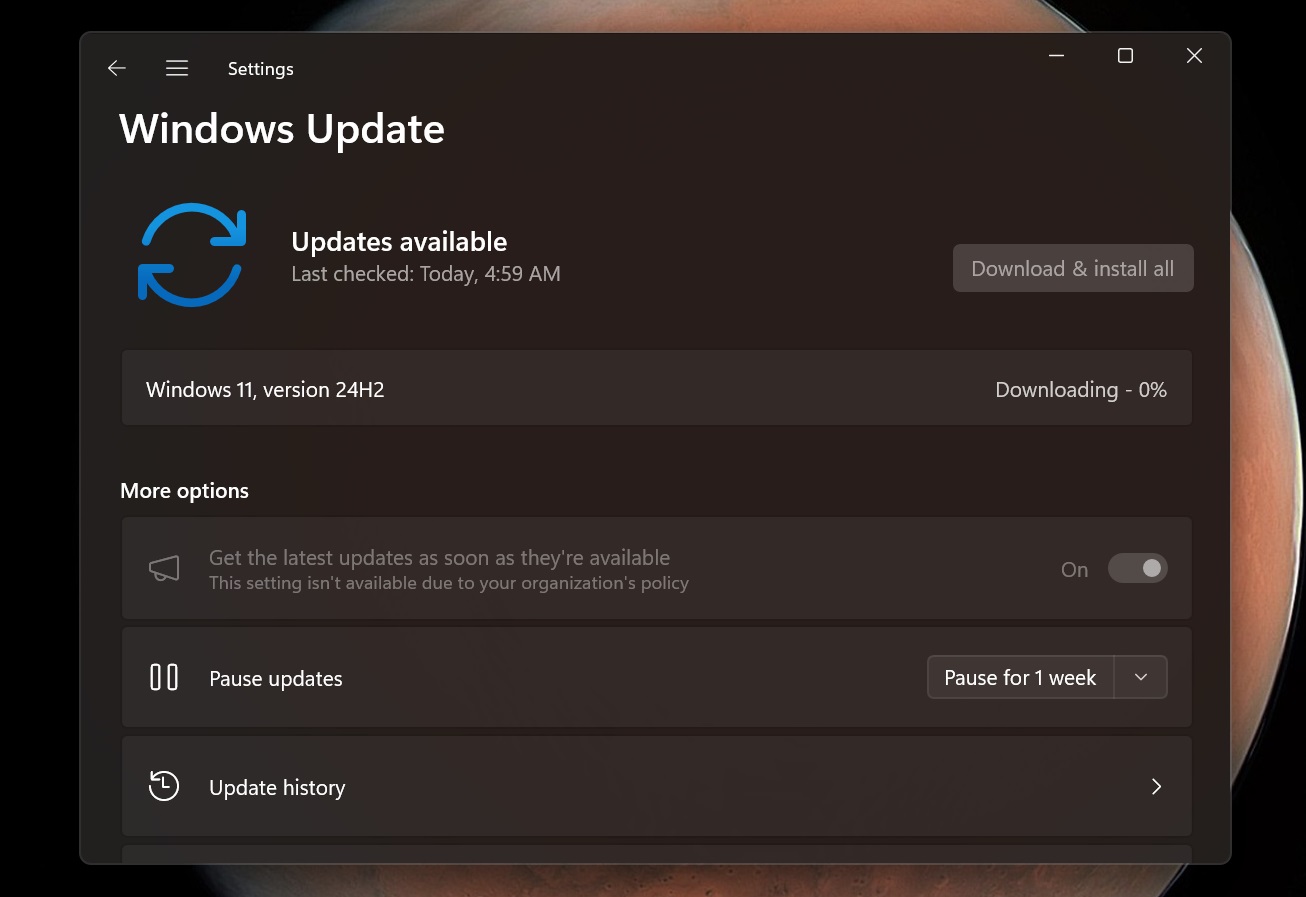

When the setting is the default, it may not look for the newest update if it’s not recommended by Microsoft for your config or is simply not ready for a wider rollout.
Changing this group policy skips the wait.
PC doesn’t have a Group Policy Editor?
Windows 11 Home version doesn’t have the Group Policy Editor. But that’s not a big issue.
Group Policy Editor is basically a GUI for changing Registry keys and values when you change a policy. So, you can use the Registry Editor to change the same reg key to get the Windows 11 24H2 update.
Repeat the following steps:
- Press the Win key, type regedit, and press Enter.
- UAC pop-up will appear. Click on OK to launch the app.
- Navigate to HKEY_LOCAL_MACHINE\SOFTWARE\Policies\Microsoft\Windows\Windowsupdate subkey.
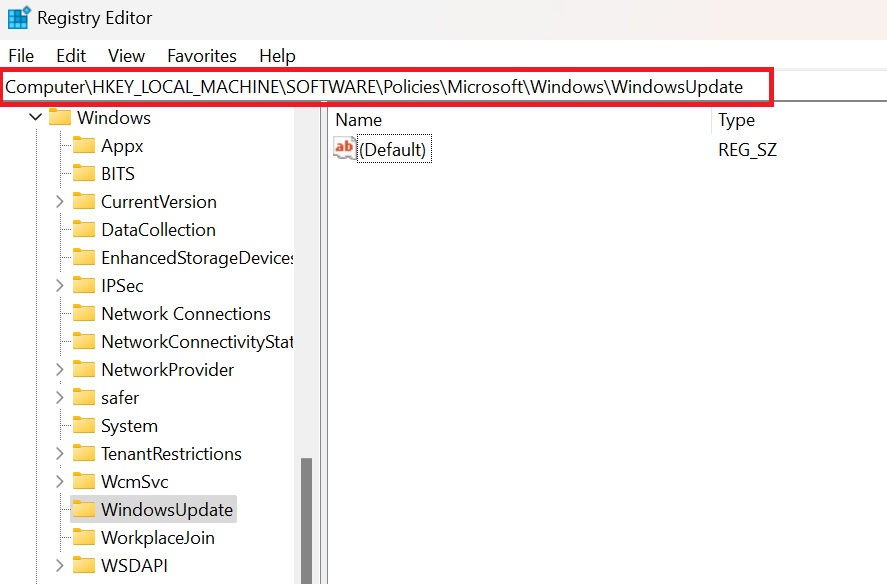

- Right-click and select New > String Value.
- Name the value ProductVersion and set its Value Data to Windows 11. Click on OK.
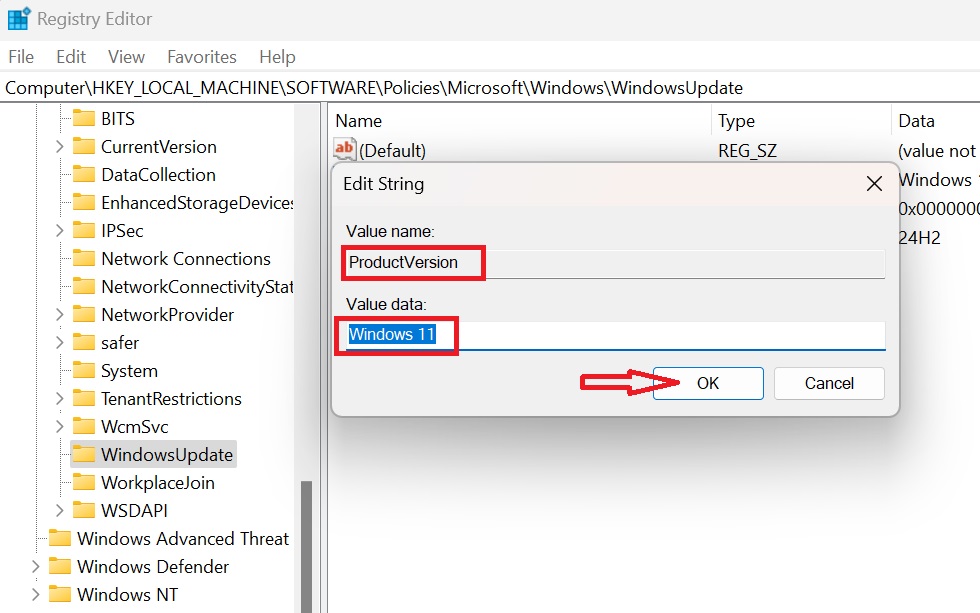

- Create another value by selecting New > String Value. Name it TargetReleaseVersionInfo and set its Value Data to 24H2. Click on OK.
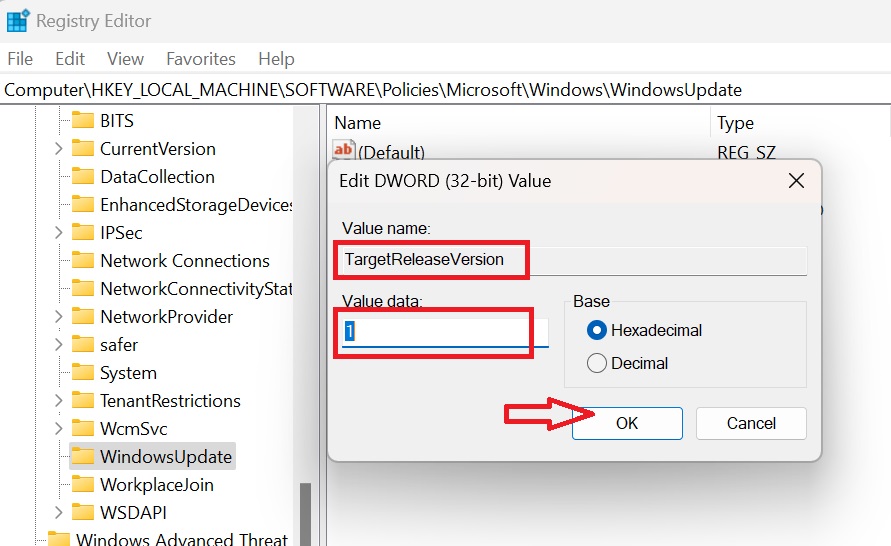

- Lastly, right-click and select New > DWORD (32-bit) Value.
- Name it TargetReleaseVersion and set the Value Data to 1. Click on OK.
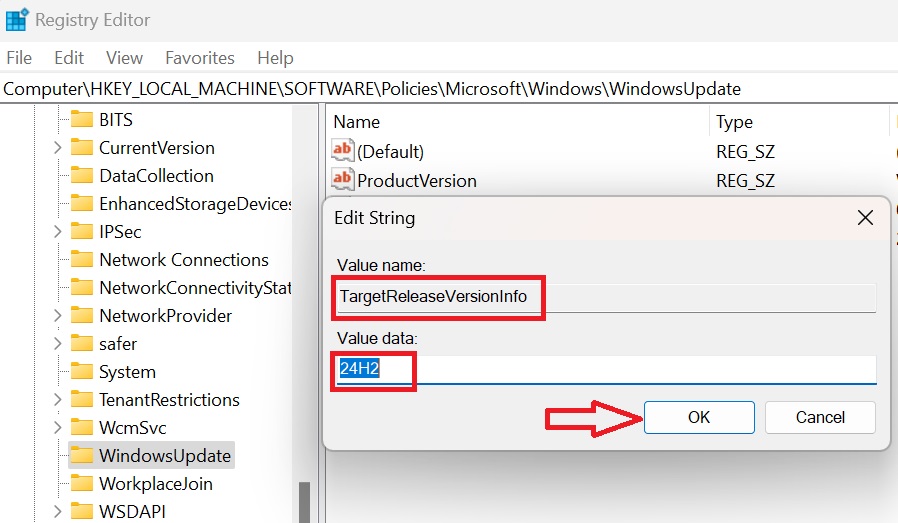

- Close the Registry Editor and restart your PC.
Windows 11 24H2 update will appear when you manually check for PC updates.
The Group Polilcy and Registry “hack” are two ways to force Windows Update to give you Windows 11 24H2. You can also go the long route and do a repair install or clean install on your PC.
We have a dedicated guide for these methods, including using .ISO files, but modifying the system policy or registry is a better option.
The download and installation will be faster. After installing the update, you’ll need to disable the policy or remove the registry keys.
